Tag Archives: featured

Grooming Requirements for Longhaired Dachshunds: Keeping Your Pup’s Coat Beautiful and Healthy

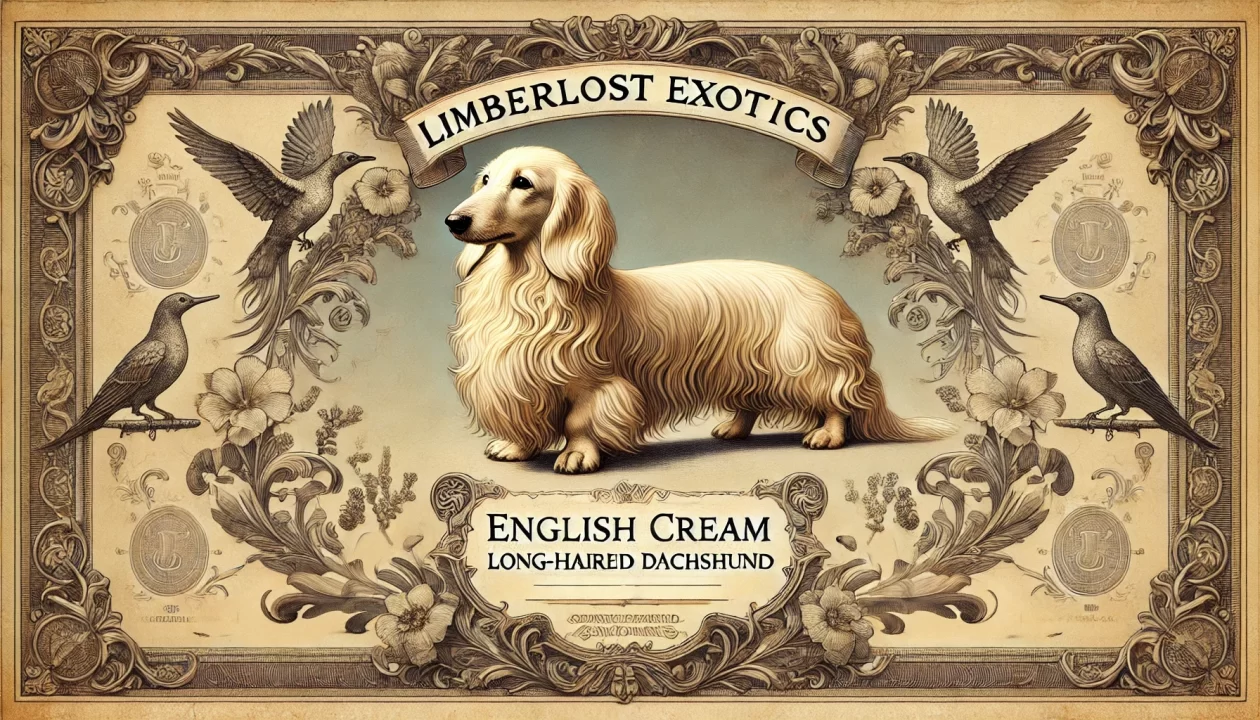
Longhaired Dachshunds are known for their elegant, silky coats, which set them apart from their smooth and wire-haired counterparts. While their flowing fur gives them a regal appearance, it also requires regular grooming to keep it tangle-free, healthy, and looking its best. Whether you’re a new owner or looking for better grooming strategies, this guide covers everything you need to know about maintaining a longhaired Dachshund’s coat.

  1. Brushing: The Key to Preventing Tangles and Mats

Longhaired Dachshunds have a soft, feathery coat that can easily develop tangles and mats, especially around the ears, chest, belly, and legs. Regular brushing is essential to keep their coat smooth and free of knots.

How Often Should You Brush?
• At least 3-4 times a week for maintenance.
• Daily brushing is recommended for dogs prone to tangles or during shedding season.

Best Brushes for Longhaired Dachshunds
• Slicker brush – Helps remove tangles and loose hair.
• Steel comb – Ideal for detangling finer fur around the ears and legs.
• Bristle brush – Adds shine and smooths the coat after detangling.

Brushing Tips
• Always start at the ends of the fur and work your way up to avoid pulling.
• Use a detangling spray if you encounter knots.
• Focus on areas prone to matting, such as behind the ears, under the arms, and along the feathering on the legs and belly.

  1. Bathing: How Often and What to Use

Longhaired Dachshunds don’t require frequent baths, but regular washing helps keep their coat clean and fresh.

How Often Should You Bathe?
• Every 4-6 weeks, or as needed if they get dirty.
• Avoid over-bathing, as it can strip natural oils and cause dry skin.

Best Shampoos for Longhaired Dachshunds
• Mild, moisturizing shampoo – Keeps the coat hydrated.
• Oatmeal or aloe-based shampoo – Great for dogs with sensitive skin.
• Conditioner – Helps detangle and add shine to long fur.

Bathing Tips
• Use lukewarm water to avoid discomfort.
• Massage shampoo gently into the fur, focusing on feathered areas.
• Rinse thoroughly to prevent residue buildup, which can cause itching.
• Towel-dry first, then use a low-heat setting on a blow dryer to prevent mats from forming as the coat dries.

  1. Trimming: Keeping Their Coat Neat

While Longhaired Dachshunds don’t need full haircuts, regular trimming helps maintain their coat’s shape and prevent excessive tangling.

Areas That Need Regular Trimming
• Feet and paw pads – Trim excess hair to prevent dirt buildup and slipping.
• Ears – Remove long, tangled hairs for better hygiene.
• Tail and belly feathering – Light trims help prevent mats and make maintenance easier.
• Hygiene areas – Trim around the rear to keep things clean.

DIY or Professional Grooming?
• Many owners trim their dogs at home with rounded-tip scissors or pet clippers.
• For a polished look, a professional groomer can help maintain the coat’s natural flow while keeping it tidy.

  1. Ear and Eye Care: Preventing Infections

Dachshunds’ floppy ears trap moisture and dirt, making them prone to ear infections. Their long facial hair can also collect debris around the eyes.

Ear Care Routine
• Check ears weekly for redness, bad odor, or wax buildup.
• Use a veterinarian-approved ear cleaner to gently wipe the ears.
• Keep the ear hair trimmed to allow airflow.

Eye Care Routine
• Wipe away tear stains or debris using a soft, damp cloth or pet-safe wipes.
• Trim any long hairs around the eyes that could cause irritation.

  1. Nail Trimming: Essential for Comfort and Health

Long nails can affect your Dachshund’s posture, gait, and overall comfort. Their nails should be trimmed every 2-3 weeks to prevent overgrowth and splitting.

Best Tools for Nail Trimming
• Dog nail clippers – Guillotine-style or scissor-style work best.
• Nail grinder – Smooths rough edges and helps avoid cutting too short.

Nail Trimming Tips
• Trim small amounts at a time to avoid cutting the quick (the sensitive part inside the nail).
• If unsure, have a groomer or vet trim your dog’s nails to prevent injury.

  1. Managing Shedding: Keeping the Coat Under Control

Longhaired Dachshunds shed moderately year-round, with heavier shedding in the spring and fall.

Ways to Reduce Shedding
• Regular brushing removes loose hair before it spreads around the house.
• Omega-3 supplements support coat health and reduce excessive shedding.
• A high-quality diet rich in protein keeps the coat strong and shiny.

Final Thoughts: Grooming as Bonding Time

Grooming your Longhaired Dachshund isn’t just about keeping them looking their best—it’s also a great opportunity to bond. With consistent care, their coat will remain soft, healthy, and free of mats, allowing them to feel as good as they look.

By incorporating regular brushing, bathing, trimming, and ear care into your routine, you’ll keep your Longhaired Dachshund comfortable, happy, and turning heads with their beautiful flowing coat!

The Link Between Obesity and IVDD in Dachshunds: What Every Owner Needs to Know

Dachshunds are beloved for their long bodies, short legs, and playful personalities. However, their unique structure also makes them prone to intervertebral disc disease (IVDD)—a serious spinal condition that can lead to pain, mobility issues, or even paralysis. One of the biggest risk factors for IVDD in Dachshunds is obesity. Understanding the correlation between weight and spinal health is crucial for preventing this debilitating condition and ensuring your Dachshund lives a long, active life.

What is IVDD?

Intervertebral disc disease (IVDD) is a condition where the cushioning discs between the vertebrae degenerate and become prone to herniation or rupture. This can put pressure on the spinal cord, leading to symptoms ranging from mild discomfort to complete paralysis.

Dachshunds are especially at risk because of their chondrodystrophic (dwarf) body structure—their long spines and short legs create additional strain on the back, making them more susceptible to disc problems. Studies estimate that 1 in 4 Dachshunds will develop IVDD in their lifetime.

How Obesity Increases the Risk of IVDD

Excess weight significantly increases a Dachshund’s chances of developing IVDD. Here’s how:

  1. Increased Spinal Pressure

The spine of a Dachshund is already under strain due to their body shape. Extra weight amplifies this pressure, putting excessive stress on the intervertebral discs. Over time, this accelerates disc degeneration and makes them more prone to rupture.

  1. Reduced Mobility and Muscle Weakness

Overweight Dachshunds often have limited mobility, which leads to weaker core and back muscles. These muscles play a critical role in supporting the spine. When they are underdeveloped, the discs bear more of the burden, increasing the risk of injury.

  1. Chronic Inflammation and Slower Healing

Obesity is associated with chronic inflammation, which can negatively impact disc health. Additionally, overweight dogs tend to heal more slowly from injuries or surgeries, making recovery from IVDD more difficult.

  1. Increased Risk of Herniation from Everyday Movements

Dachshunds are naturally active dogs, but when they are overweight, even normal movements like jumping, climbing stairs, or playing can cause excessive strain on their spine. A simple misstep can trigger a severe IVDD episode in an obese Dachshund.

Preventing IVDD Through Weight Management

The good news is that maintaining a healthy weight significantly reduces the risk of IVDD. Here’s how you can keep your Dachshund at an ideal weight and protect their spinal health:

  1. Proper Diet and Portion Control
    • Feed a high-quality, well-balanced diet formulated for small breeds.
    • Use measured portions to avoid overfeeding. Many Dachshunds will overeat if given the chance!
    • Limit high-calorie treats and opt for healthy alternatives like carrots, green beans, or lean meats in moderation.
  2. Regular, Low-Impact Exercise
    • Daily exercise helps maintain muscle tone and mobility without overstraining the spine.
    • Short walks, controlled play sessions, and gentle strengthening exercises are ideal.
    • Avoid high-impact activities like jumping on and off furniture. Use pet stairs or ramps instead.
  3. Routine Weight Monitoring
    • Regularly weigh your Dachshund and monitor body condition.
    • You should be able to feel their ribs without excess fat covering them.
    • Consult your vet if you’re unsure whether your dog is at a healthy weight.
  4. Strengthening Core and Back Muscles
    • Controlled exercises like standing on a balance pad or slow, supervised walking on different surfaces can improve spinal stability.
    • Swimming is a low-impact activity that helps build muscle while reducing strain on the joints and spine.

What to Do If Your Dachshund Shows Signs of IVDD

Even with the best preventative measures, IVDD can still occur. If you notice any of the following symptoms, seek immediate veterinary attention:
• Reluctance to jump, play, or move normally
• Weakness in the back legs or wobbliness
• Crying or yelping when touched or picked up
• Arched back or stiff posture
• Sudden loss of bladder or bowel control

Early intervention can make a huge difference in recovery. Treatment options range from medication and crate rest for mild cases to surgery for severe cases.

Final Thoughts: Prevention is Key

While Dachshunds are naturally predisposed to IVDD, obesity is a preventable risk factor that owners can control. Keeping your Dachshund at a healthy weight not only reduces their risk of spinal issues but also enhances their quality of life, mobility, and longevity.

By focusing on proper diet, regular exercise, and spinal-friendly habits, you can help your Dachshund live a happy, pain-free life.

A healthy Dachshund is a happy Dachshund—keep them fit and their spine will thank you!

Leveraging Your Dog’s Motivation for Effective Training

Training your dog can be an incredibly rewarding experience, but one of the key factors in success is understanding what motivates them. Every dog is unique, and using the right motivation can turn training from a frustrating chore into an enjoyable and productive process. By identifying what drives your dog—whether it’s food, toys, praise, or something else—you can make training sessions more engaging and effective.

  1. Identifying Your Dog’s Primary Motivators

Dogs are individuals, and what excites one may not interest another. The first step is to determine what your dog values most. Here are common motivators:
• Food Rewards: Most dogs are highly food-motivated. Treats, kibble, or special snacks can be used as powerful reinforcers.
• Toys and Play: Some dogs will do anything for a game of fetch or tug-of-war. Using toys as a reward can be just as effective as treats.
• Praise and Affection: Certain dogs respond best to verbal praise, petting, or excited encouragement.
• Environmental Rewards: For adventurous dogs, being allowed to sniff, explore, or chase after something can be a powerful training tool.

How to Find the Best Motivator
• Try offering different types of rewards and see which one excites your dog the most.
• Rank rewards by value—some dogs will work harder for a piece of chicken than for dry kibble.
• Watch your dog’s body language to see what gets their tail wagging and eyes focused.

  1. Using Motivation to Reinforce Training

Once you know what drives your dog, you can use it strategically in training.

A. Food Rewards for Teaching New Behaviors

Food is a universal motivator for most dogs and is especially useful for teaching new commands. To maximize effectiveness:
• Use high-value treats (cheese, chicken, or freeze-dried liver) for difficult tasks.
• Keep treats small and quick to eat to maintain momentum.
• Use a variable reward schedule once a behavior is learned—this keeps the dog engaged without becoming reliant on treats.

B. Toy and Play Motivation for High-Energy Dogs

If your dog loves toys, use play as a reward:
• Ask for a behavior (like “sit”) before throwing the ball.
• Reward recalls with a quick game of tug-of-war.
• Use a flirt pole or fetch game to reinforce commands like “stay” and “come.”

C. Praise and Affection for Velcro Dogs

Some dogs thrive on verbal praise and touch.
• Use an upbeat, excited voice when your dog performs a command correctly.
• Pair praise with gentle petting or belly rubs.
• Make praise meaningful by reserving your most enthusiastic reactions for great behavior.

D. Environmental Rewards for Curious Dogs

For dogs who love sniffing or exploring, you can use their surroundings as a reward:
• Ask for a “sit” before allowing them to sniff a new spot on a walk.
• Teach impulse control by requiring “wait” before opening the door for outside time.
• Use permission-based rewards (e.g., “Go play!” after sitting calmly).

  1. Adjusting Motivation for Training Challenges

Not all situations require the same level of motivation. Adjust rewards based on:
• Distractions: Use higher-value rewards in high-distraction environments.
• Difficulty: More challenging behaviors deserve bigger payoffs.
• Engagement: If your dog loses interest, switch up the reward type to keep things fresh.

  1. Avoiding Over-Reliance on One Reward

While motivation is key, balance is important.
• Rotate rewards to prevent predictability.
• Gradually phase out treats by using praise or play as alternatives.
• Introduce real-life rewards (like freedom or playtime) into everyday training.

Final Thoughts: Training with Motivation Builds Success

Using what motivates your dog is the best way to create enthusiastic learners. When training is fun and rewarding, your dog will be eager to participate, making the learning process smoother and more effective. Whether it’s treats, toys, praise, or exploration, find what excites your dog and leverage it to build trust, engagement, and lifelong skills.

Happy training!

Raising a Confident Puppy: Building Trust Instead of Insecurity

Bringing a new puppy into your home is an exciting adventure, but it also comes with the responsibility of shaping their confidence and emotional resilience. A confident puppy grows into a well-adjusted adult dog, while an insecure one may struggle with anxiety, fearfulness, and reactivity. So, how can you help your puppy develop self-assurance instead of insecurity?

  1. Socialization Done Right

Socialization is one of the most critical factors in raising a confident puppy. However, it’s not just about exposing them to as many people, places, and things as possible—it’s about ensuring they have positive experiences with new stimuli.

Tips for Proper Socialization:
• Introduce your puppy to new sights, sounds, and textures gradually.
• Pair new experiences with treats, play, and praise.
• Allow your puppy to approach new things at their own pace—never force them.
• Observe their body language; if they seem nervous, give them space and encouragement rather than pushing them.

A well-socialized puppy learns that the world is a safe and interesting place, not something to be afraid of.

  1. Avoid Overprotecting or Coddling

It’s natural to want to comfort your puppy when they seem scared, but too much reassurance can reinforce insecurity. For example, if your puppy is hesitant about walking on a new surface and you pick them up instead of letting them figure it out, you’re teaching them that they can’t handle challenges on their own.

Instead, offer gentle encouragement and let them problem-solve. Stand by their side, use an upbeat voice, and reward small steps toward bravery.

  1. Train with Positive Reinforcement

Using positive reinforcement training builds confidence by teaching your puppy that their actions have positive outcomes.

Training Tips:
• Reward good behavior with treats, praise, and play.
• Use clear, consistent commands to avoid confusion.
• Keep training sessions short and fun.
• Celebrate small wins—every step toward progress matters!

Punishment or harsh corrections can create insecurity and erode trust. Focus on guiding your puppy with patience and encouragement.

  1. Encourage Independence

A puppy that learns to be independent will be more self-assured. Encourage your puppy to explore and solve small challenges on their own.

Ways to Foster Independence:
• Let them spend time alone in a safe space (crate training can help).
• Encourage them to play with interactive toys that require problem-solving.
• Gradually introduce short separations so they don’t develop separation anxiety.

A puppy that always relies on their human for confidence may struggle with fear when left alone.

  1. Expose Them to Gentle Challenges

Mild challenges help build resilience. Create safe, controlled situations where your puppy learns to navigate new experiences successfully.

Examples:
• Walking on different surfaces (grass, gravel, hardwood, etc.).
• Exploring safe obstacles like stepping over a small log.
• Meeting calm, friendly dogs in controlled settings.
• Hearing different sounds (vacuum, doorbell, traffic) at a low volume first.

Each small victory strengthens their confidence!

  1. Be a Calm, Confident Leader

Dogs pick up on human emotions. If you’re anxious, they’ll sense it and mirror your feelings. Approach situations with a calm, assured demeanor.

How to Lead with Confidence:
• Use a steady, positive tone of voice.
• Handle new experiences with ease—if you act like something is no big deal, your puppy is more likely to follow suit.
• Set clear expectations and boundaries with consistency.

  1. Respect Their Individual Personality

Every puppy has a unique temperament. Some are naturally bold, while others are more reserved. Avoid comparing your puppy to others and instead focus on helping them grow at their own pace.

For shy puppies, take extra time to build confidence without overwhelming them. For overly bold puppies, guide them toward appropriate behavior while maintaining their enthusiasm.

Final Thoughts: Confidence is Built Through Trust

Confidence isn’t about making your puppy fearless—it’s about teaching them that the world is safe, they have control over their actions, and they can rely on you for support. When you socialize them thoughtfully, train with positivity, and encourage independence, you set the foundation for a well-adjusted, happy adult dog.

By focusing on confidence over insecurity, you’re not just raising a great pet—you’re raising a lifelong companion who trusts you completely.

How to Avoid Creating Separation Anxiety in Your New Puppy

Bringing home a new puppy is an exciting time filled with cuddles, playtime, and bonding. However, one of the biggest mistakes new puppy owners make is unintentionally creating separation anxiety by spending too much time with their puppy in the early weeks—only to suddenly leave them alone later on.

Separation anxiety can lead to destructive behavior, excessive barking, whining, and even physical distress when a dog is left alone. Fortunately, with the right approach, you can prevent separation anxiety and help your puppy grow into a confident, well-adjusted dog.

Here’s how to set your puppy up for success and avoid creating dependence that leads to anxiety when you’re not around.

  1. Start Alone Time from Day One

Many new owners make the mistake of never leaving their puppy alone at first—and then suddenly expecting them to handle being alone when work or other commitments resume. Instead, it’s important to introduce short periods of alone time from the very beginning.

How to do it:
• Crate Training: Start with 5–10 minute sessions of quiet time in a crate or playpen while you’re still in the house.
• Use a Safe Space: A puppy-proofed area like a playpen or a designated puppy room helps them feel secure.
• Slowly Increase Time Apart: Gradually extend alone time in small increments to build independence.

By making alone time a normal and positive experience, your puppy won’t panic when you leave.

  1. Avoid Excessive Attention

It’s tempting to constantly hold, cuddle, and play with your puppy, but this can create a clingy, overly dependent dog. Your puppy needs to learn that being alone is normal and safe.

What to do instead:
• Encourage Independent Play: Provide toys like Kongs, chew toys, or snuffle mats so your puppy learns to entertain themselves.
• Ignore Clingy Behavior: If your puppy follows you everywhere, don’t reinforce it by giving attention every time.
• Use a Routine: Puppies thrive on structure—set up a daily schedule with times for play, training, alone time, and rest.

Balancing attention with independence prevents your puppy from becoming overly attached and anxious when alone.

  1. Create Positive Associations with Alone Time

If your puppy learns that being alone is fun and rewarding, they’ll feel safe and confident when left alone.

Ways to make alone time positive:
• Give a Special Treat Before Leaving: A stuffed Kong, a puzzle feeder, or a high-value chew keeps them busy.
• Play Calm Music or White Noise: Sound machines or soft classical music can help reduce stress and mask outside noises.
• Don’t Make a Big Deal About Departures and Returns: Keep arrivals and goodbyes low-key to avoid making separations feel dramatic.

This approach teaches your puppy that your absence isn’t something to fear—it’s just another part of the day.

  1. Gradually Increase Time Away

Instead of suddenly leaving your puppy alone for hours, build up their tolerance slowly.

A step-by-step approach:
1. Start with short absences (5–10 minutes).
2. Leave and return calmly, without excessive greetings.
3. Increase duration over time, working up to 30–60 minutes.
4. Practice leaving at different times of the day to prevent a pattern of anxiety.

By doing this gradually, your puppy won’t panic when you’re gone for longer periods.

  1. Use Crate Training the Right Way

Crate training is one of the best ways to help a puppy feel safe when alone—but it must be introduced properly.

Do:

✔ Make the crate a cozy, positive space with soft bedding and toys.
✔ Feed meals and treats in the crate to build positive associations.
✔ Leave the door open when home so your puppy enters voluntarily.
✔ Use the crate for short periods at first before leaving them alone.

Don’t:

✘ Use the crate as punishment.
✘ Force your puppy inside when they’re scared.
✘ Leave them crated for too long (puppies need bathroom breaks!).

A well-crate-trained puppy sees their crate as a safe retreat, not a place of confinement.

  1. Train “Calm Independence” with Place Training

Teaching your puppy to relax at a distance from you helps them feel comfortable when alone.

How to practice “place training”:
1. Use a dog bed or mat and reward your puppy for lying down calmly.
2. Gradually move farther away while they stay in their “place.”
3. Increase the time they remain calm before rewarding them.

This teaches your puppy that being away from you is normal and safe.

  1. Don’t Reinforce Over-Attachment

Many owners unknowingly reinforce anxiety by rewarding needy behavior.

Common mistakes to avoid:
• Returning when the puppy cries – This teaches them that whining makes you come back.
• Carrying them everywhere – While puppies are small and cute, always holding them makes them dependent.
• Constantly talking to them when leaving – A dramatic “goodbye” increases stress.

Instead, reward calm, independent behavior and ignore attention-seeking behaviors when leaving.

  1. Get Them Used to Different People & Environments

A well-socialized puppy is less likely to develop separation anxiety.

Ways to build confidence:
• Expose them to different people, places, and sounds.
• Let them stay with trusted family members or pet sitters occasionally.
• Take them on car rides, park visits, and short trips without being overly protective.

A confident puppy that feels safe in different situations will handle alone time better.

  1. Consider a Doggy Daycare or Pet Sitter

For puppies that need supervision while owners are at work, doggy daycare or a pet sitter can be a great way to:
✔ Provide socialization.
✔ Break up long periods of alone time.
✔ Prevent destructive boredom.

However, puppies should still learn how to be alone at home, so use daycare as a supplement, not a replacement for alone training.

  1. Recognize Signs of True Separation Anxiety

Some puppies struggle more than others, and true separation anxiety is more than just whining or boredom.

Signs of severe separation anxiety:
• Excessive barking, howling, or whining for long periods.
• Destructive chewing, digging, or escaping behaviors.
• Panting, pacing, or extreme distress when alone.
• Accidents inside the house despite being potty trained.

If your puppy shows these symptoms, you may need a trainer or behaviorist to develop a specialized plan.

Final Thoughts: Set Your Puppy Up for Success

Preventing separation anxiety starts from day one with balanced attention, gradual independence training, and positive alone-time experiences.

By following these steps, your puppy will grow into a happy, confident dog that feels safe whether you’re home or away.

Have you experienced separation anxiety with a past puppy? What worked best for you? Share your tips in the comments!

Why Are Puppies So Expensive? The True Cost of Bringing Home a New Best Friend

If you’ve been searching for a new furry companion, you may have noticed that puppy prices have skyrocketed in recent years. Whether it’s a purebred dog from a reputable breeder or a trendy designer mix, puppies often come with hefty price tags, sometimes reaching thousands of dollars. But why are puppies so expensive?

The answer lies in a combination of breeding costs, demand, and responsible care. Let’s break down the factors that contribute to the high cost of puppies and why, in many cases, the price is justified.

  1. Responsible Breeding Costs Money

Reputable breeders invest heavily in their breeding programs to produce healthy, well-adjusted puppies. Unlike backyard breeders or puppy mills, ethical breeders ensure that:
• Health Testing & Genetic Screening: Parent dogs undergo expensive tests for hereditary diseases, such as hip dysplasia in large breeds or heart conditions in small breeds. These tests can cost breeders hundreds to thousands of dollars per dog.
• Quality Nutrition & Veterinary Care: Breeding dogs require high-quality food, prenatal supplements, and routine vet checkups to ensure safe pregnancies.
• Artificial Insemination & Stud Fees: If breeders use top-quality sires (male dogs), they may pay stud fees ranging from a few hundred to several thousand dollars.
• C-Sections & Medical Emergencies: Some breeds, such as French Bulldogs and Bulldogs, require C-sections for safe delivery, which can cost anywhere from $1,000 to $5,000 per litter.
• Vaccinations & Deworming: Puppies receive vaccines, deworming treatments, and microchips, all of which add to the overall cost.

These expenses quickly add up, meaning that the price of a puppy reflects the investment that went into producing a healthy, well-bred dog.

  1. High Demand Drives Up Prices

The demand for puppies dramatically increased during the COVID-19 pandemic, as people sought companionship while spending more time at home. Even after the pandemic, demand remains high, particularly for certain breeds.

Factors that drive up demand include:
• Breed Popularity: Dogs featured in movies, TV shows, or social media (such as French Bulldogs, Doodles, and Corgis) often become more expensive due to demand.
• Limited Availability: Breeders typically only have a few litters per year, and high demand means long waitlists and higher prices.
• “Designer” & Hybrid Breeds: Crossbreeds like Goldendoodles, Cavapoos, and Pomskies can be even more expensive than purebreds due to their trendy appeal.

Basic economics applies here—when demand is high and supply is limited, prices rise.

  1. First-Year Puppy Costs Add Up

Even after purchasing a puppy, the expenses don’t stop there. New puppy owners must budget for:
• Vaccinations & Vet Visits: First-year vet costs can range from $500 to $1,500, depending on location and breed.
• Spaying/Neutering: Costs range from $200 to $600, with some breeds requiring more specialized care.
• Food & Supplies: High-quality food, beds, toys, and leashes add up quickly, costing $50 to $100 per month.
• Training & Socialization: Professional training classes range from $100 to $1,000+, especially for working or stubborn breeds.

When breeders factor in the initial investment in care, it’s easy to see why puppies come with a high price tag.

  1. Avoiding Puppy Mills & Irresponsible Breeding

Cheaper puppies often come from unethical sources, such as puppy mills, backyard breeders, or online scams. These puppies may:
• Lack proper health testing, leading to genetic health issues.
• Be poorly socialized, making them fearful or aggressive.
• Come from poor living conditions, increasing the risk of illness and behavioral problems.

Reputable breeders charge more because they provide health guarantees, ethical breeding practices, and lifelong support for their puppies.

  1. Adoption as a More Affordable Option

If the cost of a purebred puppy is out of budget, adoption is an excellent alternative. Many shelters and rescues offer:
• Mixed-breed puppies for a fraction of the cost ($50–$500).
• Fully vaccinated, spayed/neutered pets ready for a home.
• A chance to save a life while still getting a wonderful companion.

Breed-specific rescues also offer purebred dogs at a lower cost, making adoption an affordable and ethical choice.

Conclusion: Are Puppies Worth the Price?

Yes! While the cost of a puppy may seem high, responsible breeders invest heavily in health, care, and ethical breeding practices. A well-bred puppy lives longer, has fewer health issues, and is better socialized, making it a worthwhile investment for dog lovers.

Whether you choose to buy from a reputable breeder or adopt from a rescue, the most important factor is finding a healthy, well-cared-for puppy that fits your lifestyle. After all, the real cost of a dog isn’t just in the purchase price—it’s in the years of love, care, and companionship they bring to your life.

Midwest Dachshund Club of Michigan

Midwest dachshund club

Limberlostexotics is a proud member of the Midwest Dachshund Club. We support AKC confirmation show events by participating in showing our dogs and learning more about the breed. If you would like to show your dogs or support a club in improving the breed click the link http://www.midwestdachshundclub.com/about-us.html to be directed to the club website, or our facebook page https://www.facebook.com/groups/1479913065650497/ also feel free to reach out to me personally with questions. limberlostexotics.com@gmail.com

Lets get Real (how to use faux plants effectively)

Intro to Faux Plants and flowers

When it comes to plants you are either have a green thumb or don’t so if you don’t what are your options? Well I’m here to tell you that you can have plants in your home that would trick even the well trained eye. I want you to understand that high quality faux plants or artificial flowers are not cheep. They often cost the same as the real thing, or in some instances are twice the amount. Considering that they will last a lifetime if stored and cared for properly I consider a worthwhile investment. Rooms that are decorated with some organic accents look much better than one that is stark and sterile.

Even the worst plant killer can usually grown some real plants and this helps to make a display that contains some fake look all the more believable. Below you can see were I have utilized some succulents in a window full of mostly real plants. Succulents while drought tolerant are not tolerant of poor light. They will quickly get leggy, pale and develop soft spots if grown in poor light. Since succulents are also a premium item having them die and deteriorate is discouraging and costly. also since succulents have a matt to glossy waxy surface and succulent leaves in real life they lend well to faux imitations.


faux and real plants display

Location Location Location

High quality artificials need to be placed in a believable setting. If you have a bunch of artificial plants sitting in the center of a room that always has the shades pulled its a dead give away that they are not real. Place your faux plants were they would actually potentially grow and thrive if they were real. Below I show a mix of fake and real plants on my office desk which is located in the basement of my home. What makes it believable is that i have a artificial light source for the few real plants. The fake plants are grouped around the light source as if they were there to get the light as well.

faux succulents

Faux plants don’t ever need to  be watered which helps if your using delicate furniture that you don’t want moisture coming in contact with. They don’t drop leaves or get bugs. Really the only downside to faux plants is that they do need to be dusted occasionally. They can fade if they are located in a setting with high light. One way to avoid this is use real plants that utilize most of the direct light. This keeps only the dappled light reaching your faux plants as seen below.

faux and real plant display

Who doesn’t like flowers on their real plants? Well of course everyone, but the fact of the matter is most plants do not continuously bloom non-stop. The relative low light in most peoples homes as well as the fact that most plants marketed for home use are low light. This leads to  infrequent blooming and adds to the disappointment. This is were faux plants come to the rescue providing cheerful blooms when your real plants are resting. below I have inserted a couple stems of faux real touch phalaenopsis orchids into a real plant that is currently resting. again placement and articulation of the flowers is critical to making it look natural. look up reference pictures if you don’t know how the flowers should be positioned.

faux orchids

Avoiding filling a space with only blooming plants as this looks pretty unnatural. The most believable set up is when you mix some foliage faux with flowering faux plants. as seen on my booster table in the kitchen.

faux succulent display

faux table display
faux table display

This photo below is all faux plants and it mixes flowering and texturally interesting succulents to make a nice display.

Again using some artificial light source i have placed real plants around this faux peony bouquet and it helps accent the creamy petals as well as make it look more realistic.

faux peony bouquet Lastly this faux brassica orchids height works well in the corner of a semi lit corner.

Artificial orchid I hope this article helped you see that faux plants can look real natural and downright gorgeous when used properly. Go and cheer up your space with some greenery even if you can’t grow the real thing.

Where to get awesome looking faux?

some great places to get realistic plants are http://Pottarybarn.com, http://Pier1.com, http://hobbylobby.com, and http://Michaels.com. I prefer to purchase in store to ensure that I’m getting what I want. Lots of times the way the faux plants are depicted online are not what they look in real life. I tend to avoid the ones that are poorly painted, or have to many obvious mold seems that are pretty obvious.

Free fall bounty for all!

By: Daniel Greiner 

Natures free bounty rains from the sky each fall so why let the squirrels have all the fun?

Believe it or not Michigan boasts many edible varieties of edible nuts. If your not in Michigan fear not because most of these species occur over much of the United states so you’ll at least be able to harvest some of these in your area.

Lets start out with Hickories:

Hickories are super tasty and my all time favorite! They are super buttery and sweet. The easiest and most recognizable hickory would be the shag bark hickories. You can spot them from a long distance by their characteristic shaggy & exfoliating bark.

They are  extremely long lived and often reside along fence rows and roads. The time to collect these is in mid to late September. The drup is often still covered in a green hull that is quartered and easy to pull off.

Once you harvest them you can drop them in a bucket of water and the ones that sink are 100% good and the ones that float may either have a worm or a small air pocket that allows it to float. I still crack open the floaters and have found them to be mostly good.

Second nut on the menu is Black Walnuts:

Now i know what your saying already….”Black Walnuts! Who eats those?!” but seriously you gotta try them. The obvious thing about them is they are literally everywhere. If you don’t know what black walnuts look like then your an idiot, just kidding lol. Black walnuts grow to be large trees with dark furrowed bark and bright green leaves that come out in bunches along the branch as seen below.

I like to think of them as Michigan’s coconut trees as they have that tropical feel to them. Once the nuts start to rain from the tree is when you need to get out there and pick them up. I gather them up in five gallon buckets.

as you can see above the walnuts I picked are perfect. The outer husk has soften and bruised and this makes for removing it a breeze. I then take a knife and cut into it and pull the husk off the nut. After you have done this wash and rinse the nuts till the water runs clear. Don’t forget to wear gloves unless you want your hands to look like someone did Indian henna art with a 4 inch brush. Trust me I have not used gloves before and you get some weird looks from people when your at the store picking out produce. It looks like you have brown crap all over your hands from hulling the walnuts. The next step after hulling and washing is drying and curing.

Here is about a bushel of black walnuts that sat in the sun for three days to dry out and begin the curing process. This allows the nut meat inside to mature and dry down a bit. If you try and eat them sooner its pretty gross so just cure the darn things okay? Curing takes 2 weeks. Hang them in a mesh bag to keep airflow around them.

Third nut on the menu is Chestnuts.

Yes i said chestnuts. You can find them in certain areas you just gotta scout it out and get there before the deer and the squirrels.

Now before you go running down the street to the tree that you think is a chestnut lets get a few things strait. The edible kind are the ones that will make your hands bleed if you try and pull the spiny hulls off them before they release.

I usually use  a stick to pop out the loose nuts. better to use a tool then make your hand bleed.  Now the “common” chestnut that most people think of is the Horse Chestnut. These are not edible and if you try to eat them you will regret it as they are oh so bitter and astringent.

Yucky chestnuts that you shouldn’t eat. The hull is spiny but not that much of a deterrent so thats a good sign its not the right kind.

So now that I’ve laid it all out for you guys go out there and make like a squirrel. Try some of natures “organic” “free” and downright tasty gifts from the sky. Stop loathing those black walnuts that you keep mowing over and pick them up and eat them!


How the hardy passion vine can transform your northern gardens

By: Daniel Greiner

IMG_2062
Passion flower sample-artistic rendition

I have always loved tropical looking plants even though I live in Michigan in zone 5. When I heard that there was a passion vine that was hardy to zone 6, I was immediately interested. The flower pictured below is Passiflora ‘incense’

IMG_1734
Passiflora Incense

This is a hybrid between Passiflora cinnicata x incarnata.

This marriage of hardiness and improved floral color and size makes for a stunning flower. This vine is reportedly hardy to zone 6. I’m sure your wondering how this works when I live in zone 5? I Keep the plant growing in a large pot and in the fall I bury the pot and all right up against the foundation of my house. The foundation stays warm enough in the winter to keep things from freezing. I have canna lilies that come up year after year there for that reason. Micro climates can extend your ability to grow things.

Here is a close up of the flower and if you could see it yourself not only does it look amazing but the smell is very rich and sweet!

IMG_1733
Passion vine growing on my garden fence

Pictured below is P. incarnata alba ‘bills delight’ this is a not often seen selection and a real treat.

IMG_1940

Passion Vine cultivars

IMG_1955

This picture shows a sample of P. incarnata alba, P. incarnata, and P. incense.

723px-Passiflora_fruit_8043

Passion vine flowers are self incompatible and require another plant that is not genetically identical to outcross with. When flowers do get pollenated, small edible ping pong sized fruits develop.

Below is a video of a be pollenating a passion flower.

IMG_2247


Passion Vine Fruit
Passion Vine Fruit

When fully ripe the fruits exterior takes on a golden hue and when it dimples you know its ripe to pick. It has sweet tart flavor and some relish its flavor.

If you desire to try and grow passion vine in cold northern areas you should try and acquire a rooted cutting, or sucker as these will establish in a pot much more rapidly. You want to try and get an advanced root system developed by fall. Seeds are not effective means to start plants for the purpose of getting a sizable plant to overwinter as they germinate so slowly.

Cultural Requirements

Passion vine like to grow in full sun. They are often found on moist ridges in full sun with their roots are shaded and the vining portions scrambling up bushes and nearby upright plants. They like a well drained, but evenly moist soil. When growing in a pot keep this in mind. You may want to add extra perlite to the media to enhance the drainage. Since this vine grows so rapidly when growing in a confined pot you will want to make sure that it is rich enough to support this type of growth without exhausting. A vine can easily grow 10 ft or more in a single season and can be cut down to the ground in the fall. Since I’m in the north and growing in a pot the plants suckering nature is of no concern to me, however others warn of its spreading tendencies.

Conclusion

Now that you have been introduced to this exotic tropical beauty with the hardiness to survive the north, please try this out for yourself. If you like tropical plants and live where its cold, your garden wouldn’t be compete without passion and passion vine.

Passion Vine Gallery